Book a free video session
Get a call scheduled with our smile specialist, they will guide you through the whole impression-taking process, ensuring a smooth start to your teeth-straightening journey.
Watch the step-by-step video
What’s inside this guide
Gather your essentials
Tray fit check
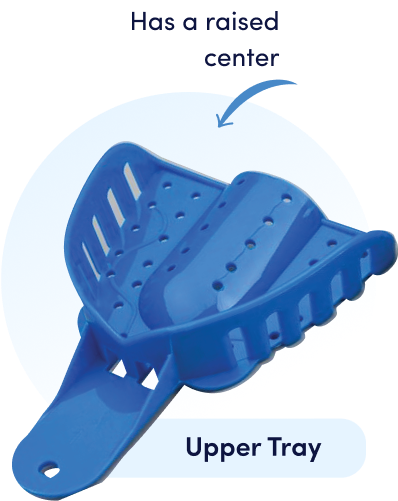
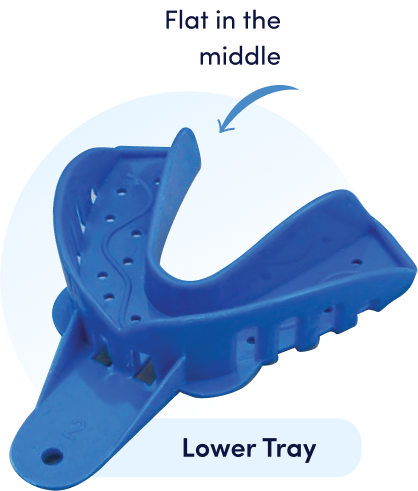
Note
If a tray doesn’t fit, call us at (516) 689-9232 for a free replacement.
Prep like a pro
Wash & sanitize hands

Brush & floss to remove food particles
Do a fit test with trays before mixing putty
Taking your first impression
Start with the upper jaw while focusing on one impression at a time
Step 1: Mix & load the putty
Put on gloves and mix the blue and white putty together.
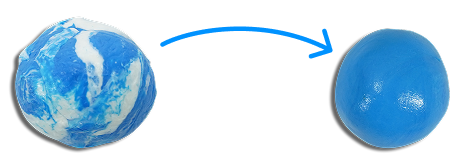
Within 30 seconds
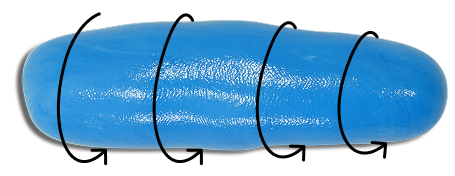
In 5 seconds
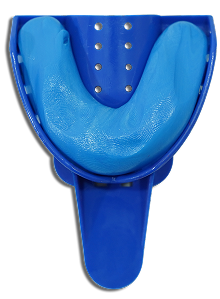
In 5-10 seconds
Step 2: Create the impression
Note: Do not remove the putty from the tray.
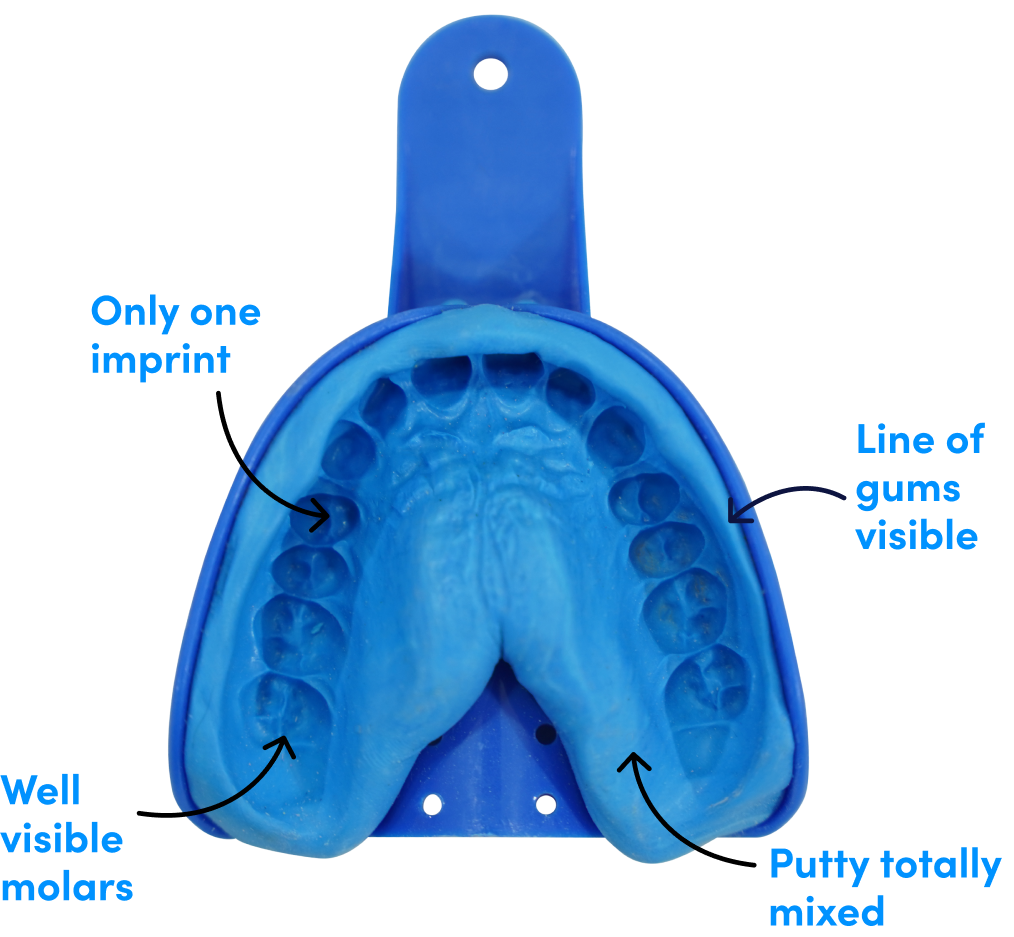
Step 3: Get approval before continuing
Step 4: It’s time for the lower teeth impression
Repeat the same process for the lower teeth. Make two impressions per arch (four total) and share the images for evaluation.

Within 30 seconds

Within 5 seconds

Within 5–10 seconds
 Hold 3 mins
Place the tray in your mouth and keep it still. Pull it upwards to remove
Step 5. Capture photos of your smile
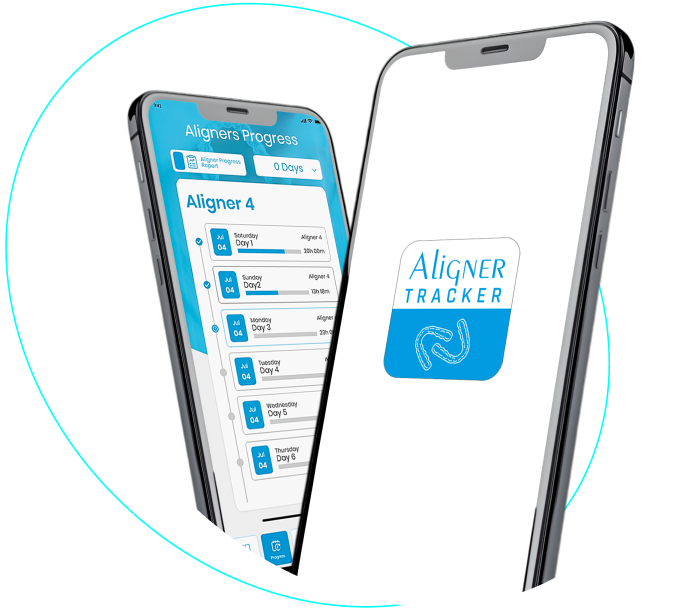
Use the cheek retractor and take close-ups of teeth and gums with good lighting or phone flash. Upload to the Caspersmile Tracker App.
06. Send it back
Well done on finishing your impressions!
Now place impressions in the provided envelope or box. Stick the pre-paid return label over the old shipping label and seal the box using the sticker provided.
How to create precise dental impressions?
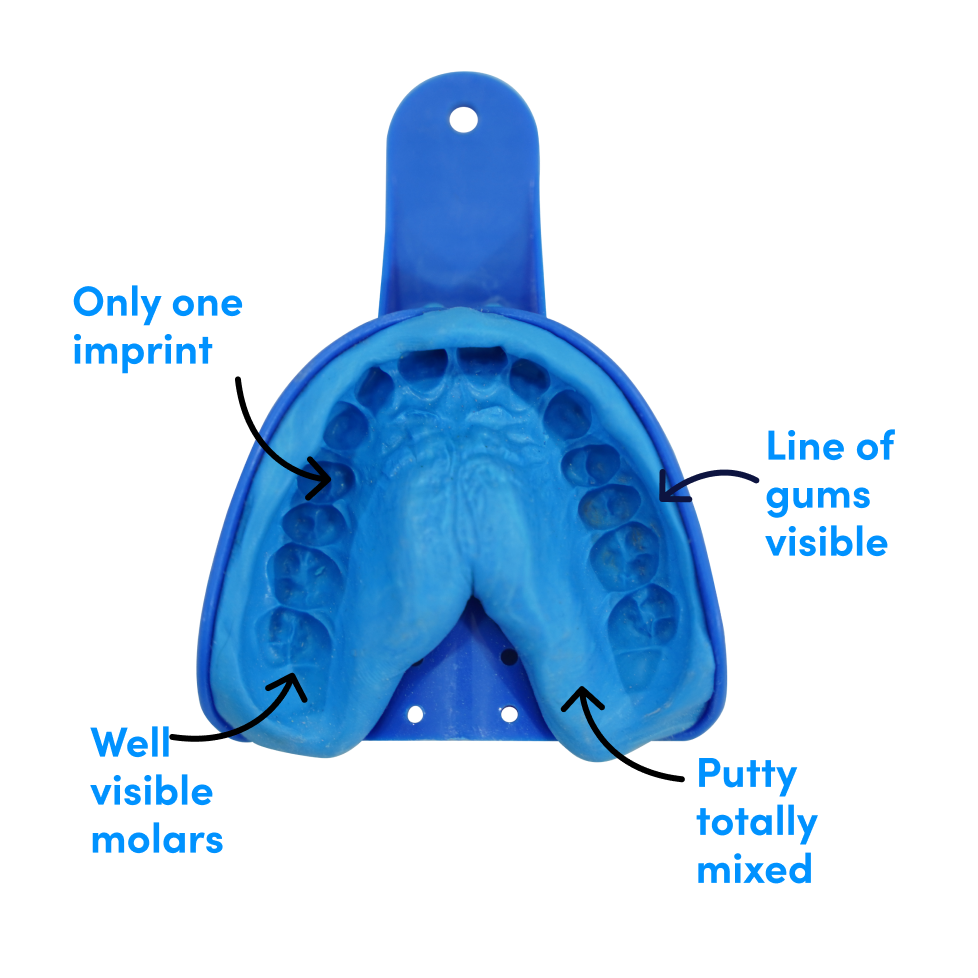
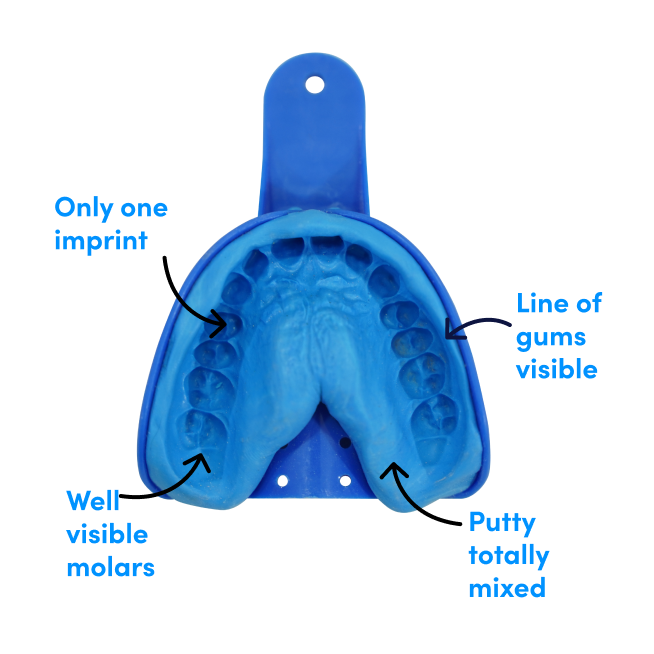
Pro tips for a perfect impression
- Keep your lips positioned over the tray so the material can flow smoothly to your gums.
- Apply gentle pressure with your thumbs when taking an upper impression and with your fingers for the lower one.
- Use each set of impression material only once to achieve a clean, detailed mold.
- Avoid reusing impression putty, as it compromises accuracy.
Common impression mistakes (and how to avoid them)
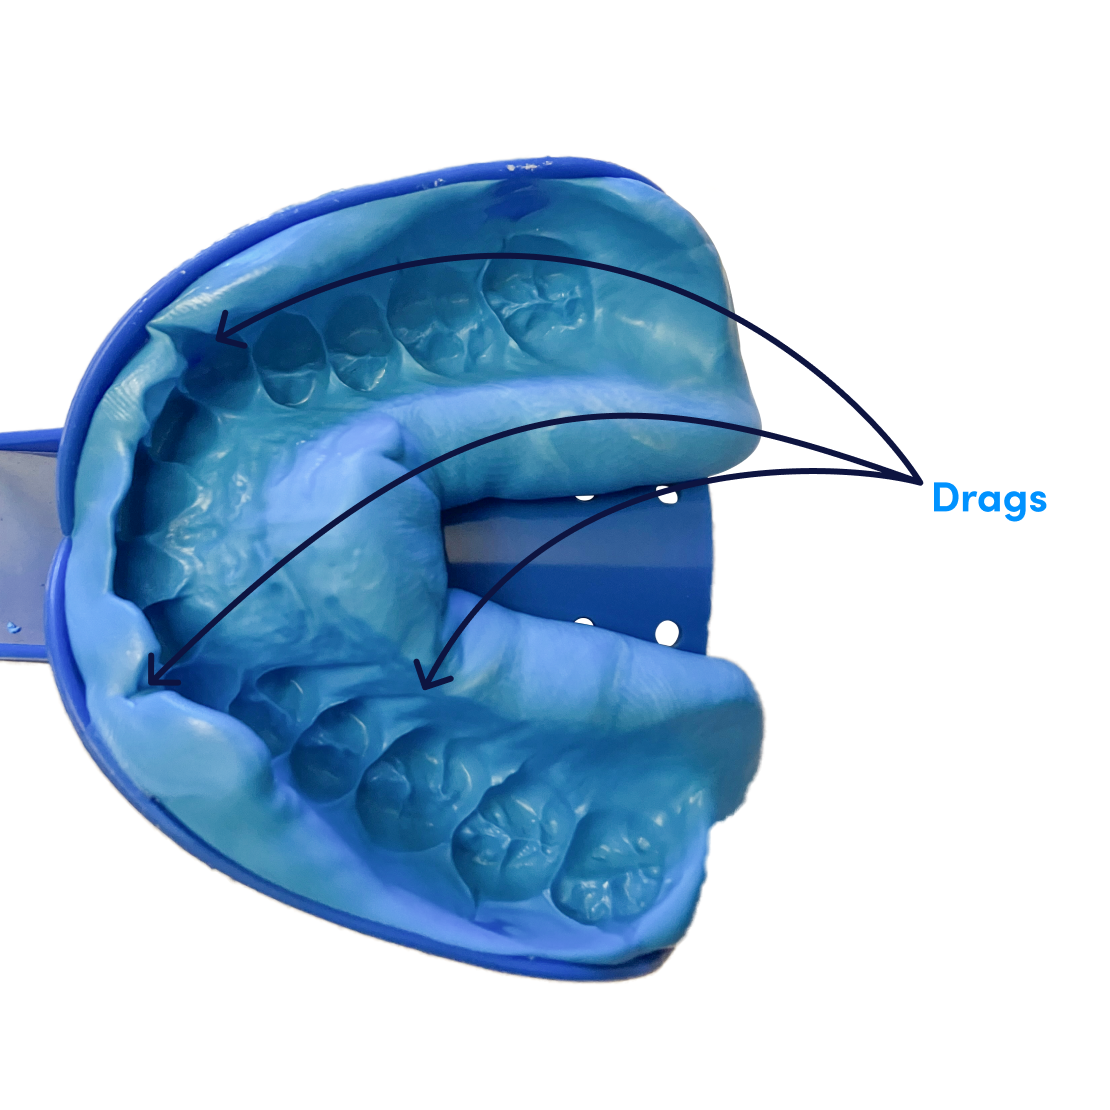
Issue #1: Drag lines
These appear if the material is removed too soon. Allow it to set fully, then pull the tray straight down for upper impressions and straight up for lower ones.
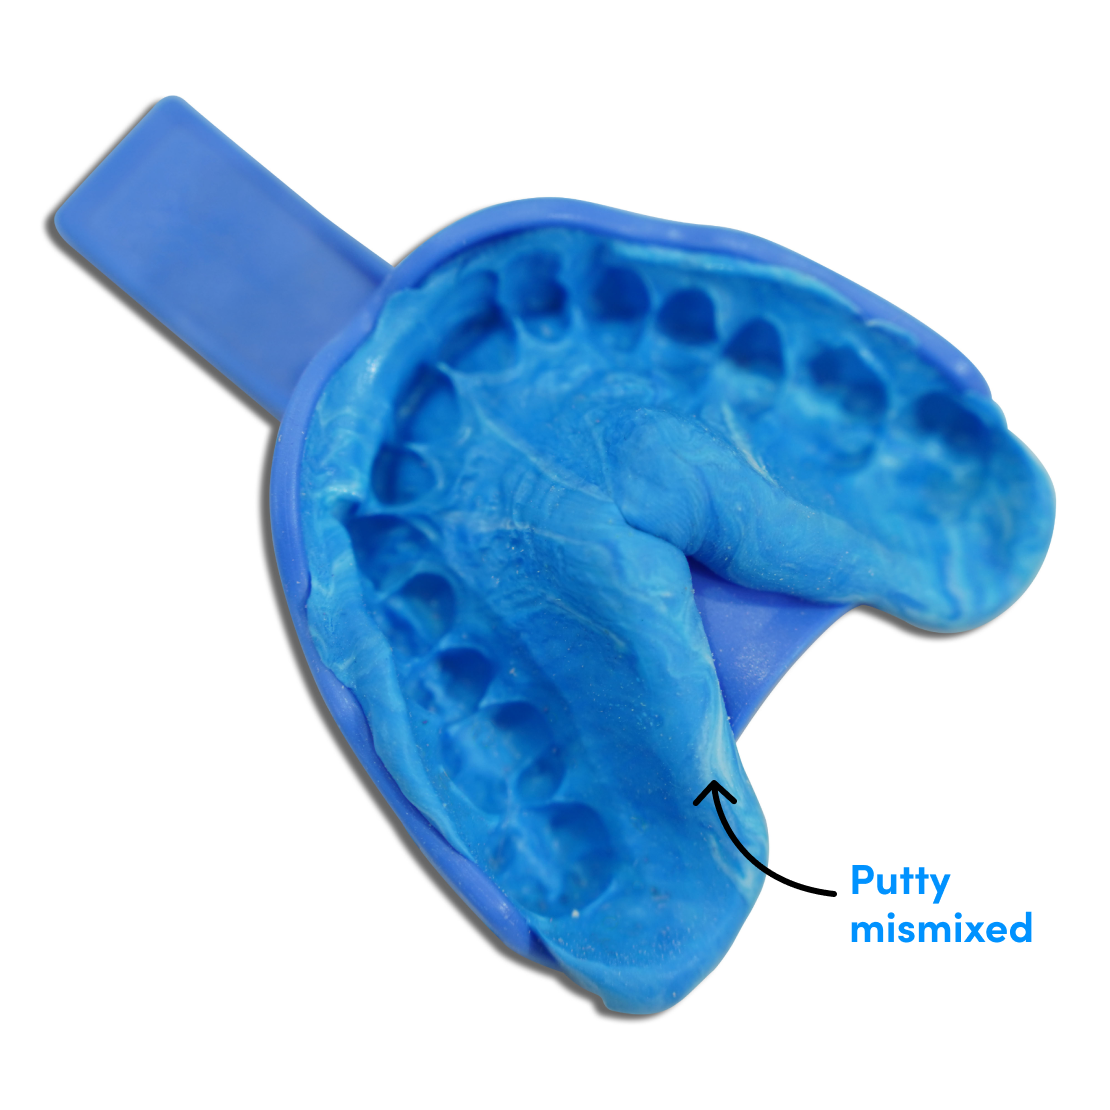
Issue #2: Uneven mixing
If streaks remain, the putties weren’t blended correctly. Mix until the color is consistent, and only do so right before loading the tray.
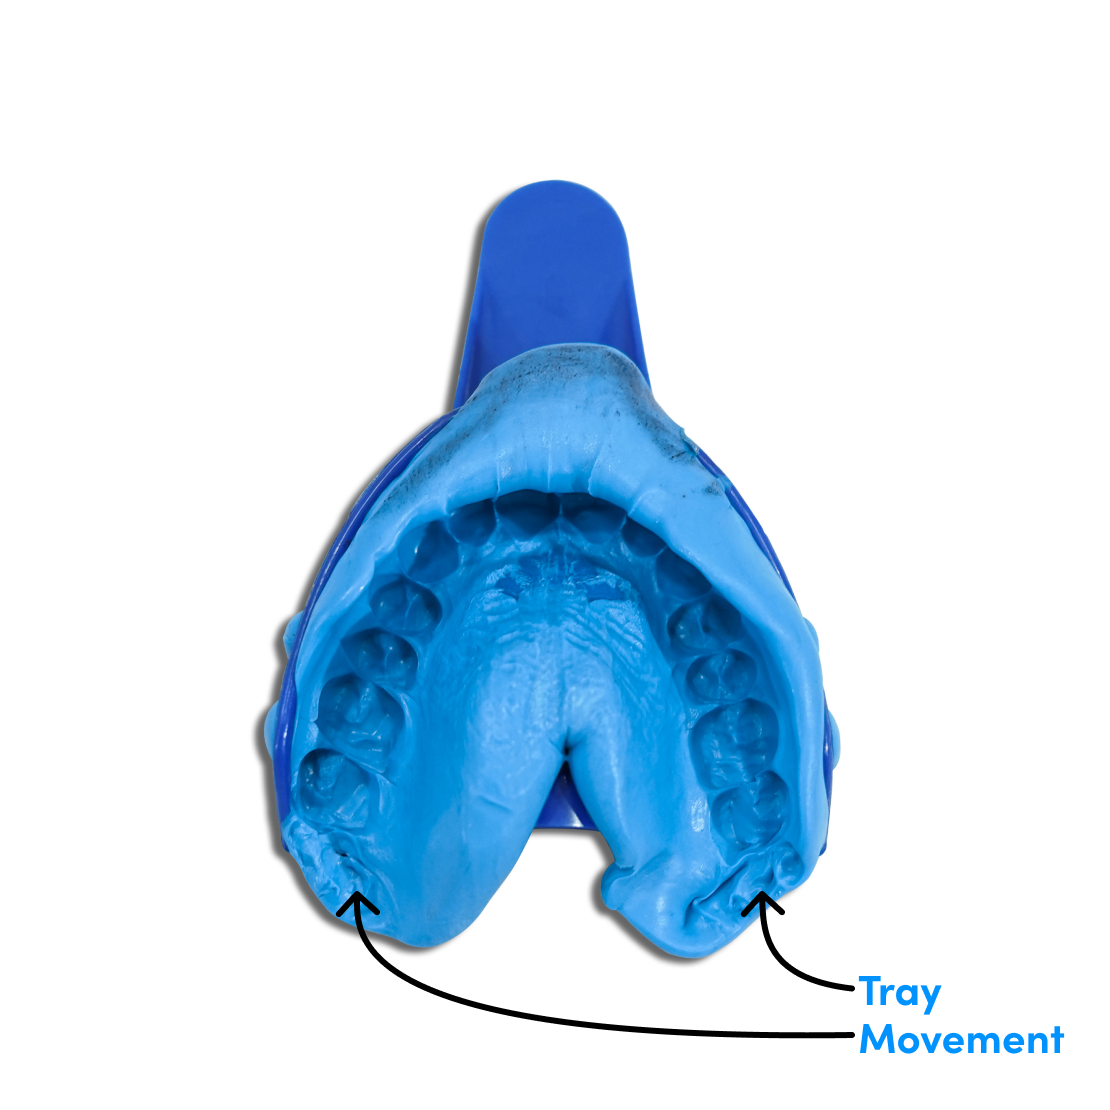
Issue #3: Tray movement
Shifting during the process can alter the mold. Hold the tray firmly in place to maintain accuracy.
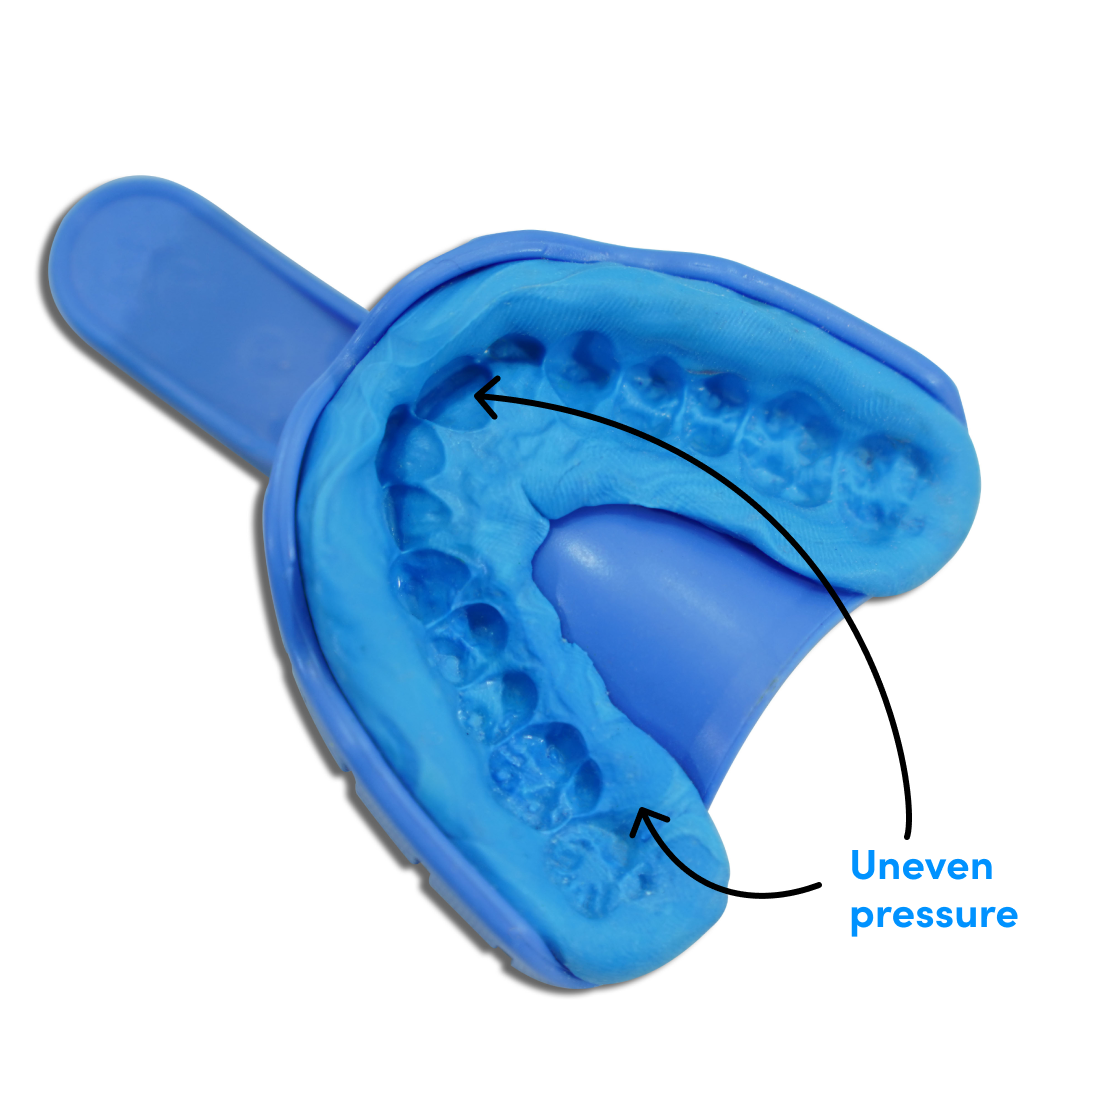
Issue #4: Uneven pressure
Apply the material with even pressure using your fingertips so it spreads across your entire dental arch, covering gums and molars from front to back.
The sooner you start, the sooner you’ll see results. Why put it off?

FAQs
Here are some of the most frequently asked questions:
How do I return my impressions?
Use the pre-paid return envelope included in your kit.
When will I get my treatment plan?
Within 2 weeks. Send impressions quickly, complete your account, and upload photos for faster processing.
What if my impressions aren’t right?
If your impressions are not approved by a smile specialist during evaluation, we suggest that you book a free virtual consultation session with our experts.


