
Book a free video session
Get a call scheduled with our smile specialist, they will guide you through the whole impression-taking process, ensuring a smooth start to your teeth-straightening journey.
Caspersmile's at-home teeth straightening guide
Jump to section
Before you start, make sure you have these items


Tray fit check
Place your teeth in the center of the tray.
Your teeth should not touch the tray walls.
The tray should fully cover from molar to molar.


Note
If your tray doesn’t fit properly, contact us at (516) 689-9232 to request a replacement.
Prepare to Impress
Prior to taking your impressions, ensure a clean and smooth process by adhering to these steps.

01 Sanitize your hands
Begin by thoroughly washing and sanitizing your hands.

02 Clean your teeth
Brush and floss to remove any particles from your teeth.

03 Fit test
Ensure the trays fit in your mouth before adding the putty material. In case of a misfit, please contact us for precise sizing assistance at (+44) 1736-800-965
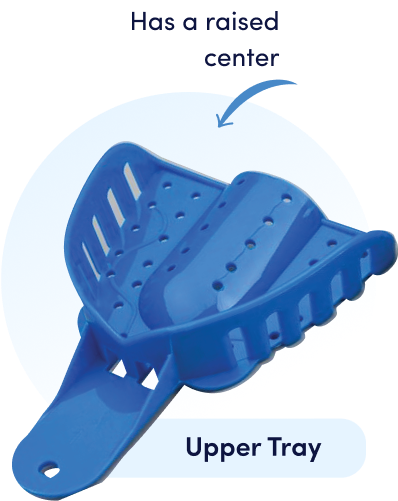
Start Taking Your Impressions
Start with the upper jaw impression. Focus on one tray at a time.
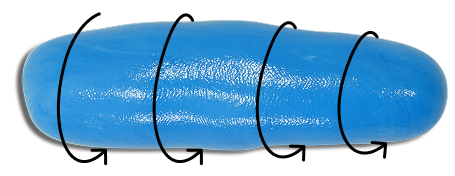
Step 1. Mix and Mould
Your impression kit contains white putty and colored putty. To make the mold, put your gloves on and mix both putties until they are thoroughly blended into one solid color.


Within 30 secs.

Within 5 secs.

Within 5-10 secs.

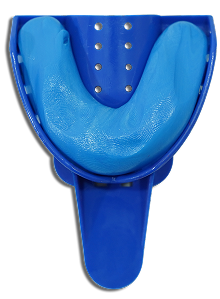
Step 2. First Impression
Hold for 4 minutes 30 seconds. Afterward, remove the tray by pulling it straight down.
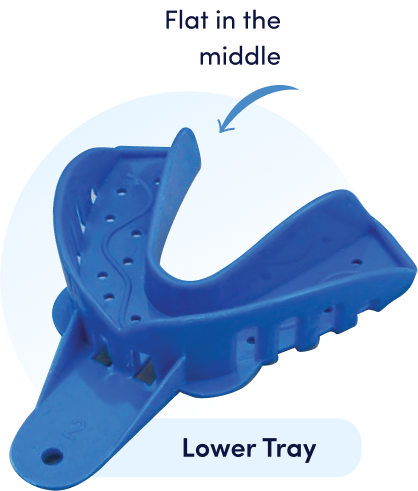
Step 3. Repeat for lower teeth

Step 4. Photograph your teeth
Now, make impressions of your lower teeth, repeating the process twice for both upper and lower arches. Send all four impressions for evaluation.
Within 30 secs.
Within 5 secs.
Within 5-10 secs.
 Hold 3 mins
Place the tray in your mouth and keep it still. Pull it upwards to remove.
Step 5. Send your impressions
Congratulations on completing your impressions!
Prepare them for return by removing the cardboard lining and placing them back in the box (keep the putty in the trays). Cover the old shipping label with the pre-paid return label. Seal the package with the provided sticker.


06. Send your impressions

Congratulations on completing your impressions!
Place all the impressions in a box or envelope. Use the provided pre-paid return label and ship them back to us.
How to create precise dental impressions?

4 key tips to keep in mind
- Keep your lips over the tray to ensure the putty reaches your gums without any obstruction.
- Use your thumbs to put gentle pressure on the upper impression and your fingers on the lower impression.
- Ensure each impression material is used only once to get a clear imprint.
- Refrain from reusing material for better impressions.
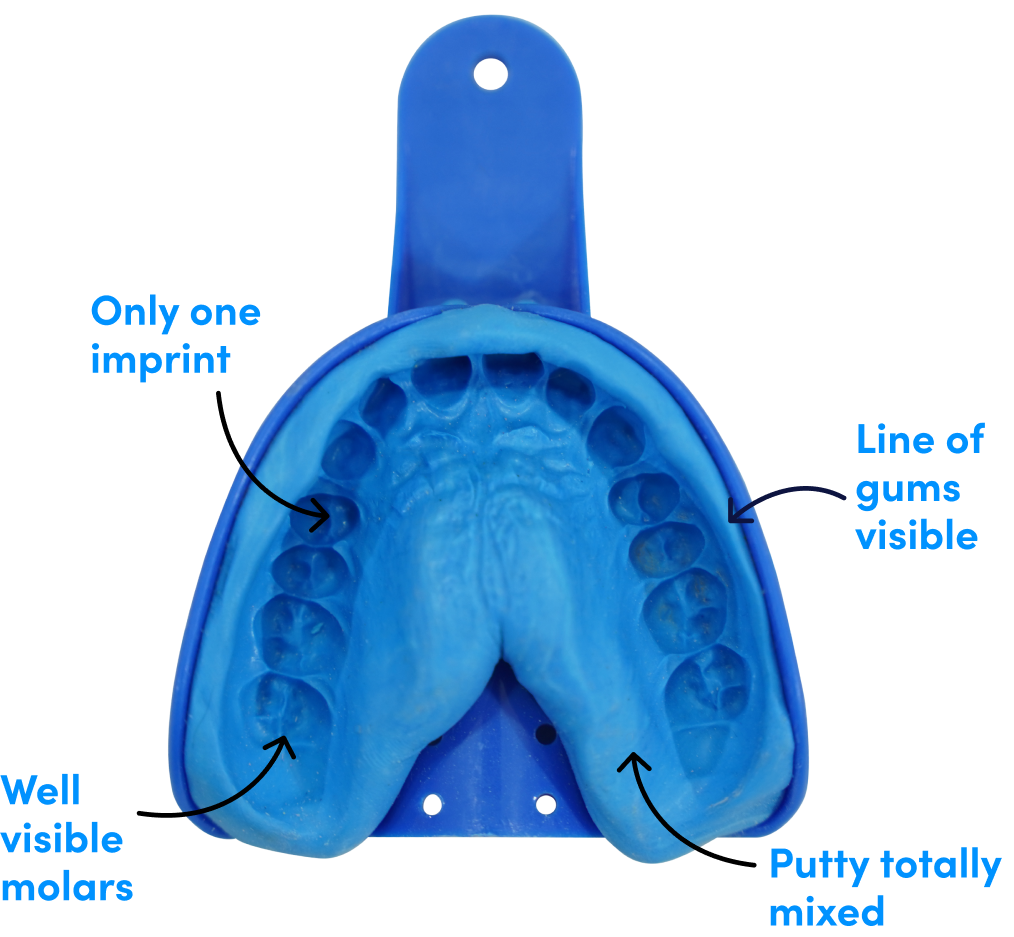
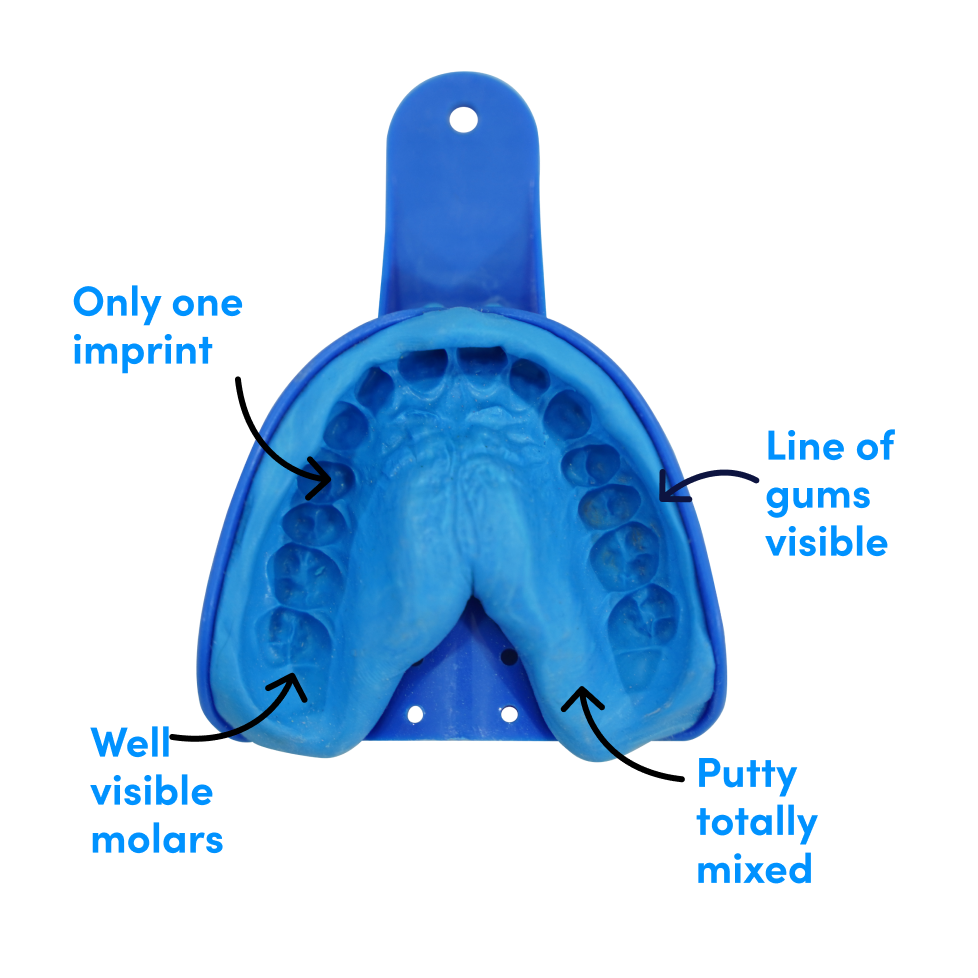
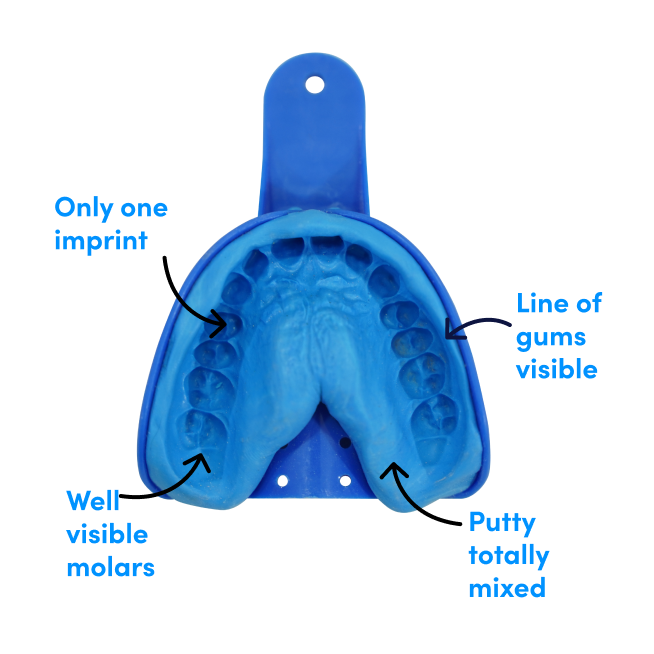
How to spot Less-Than-Perfect dental impressions
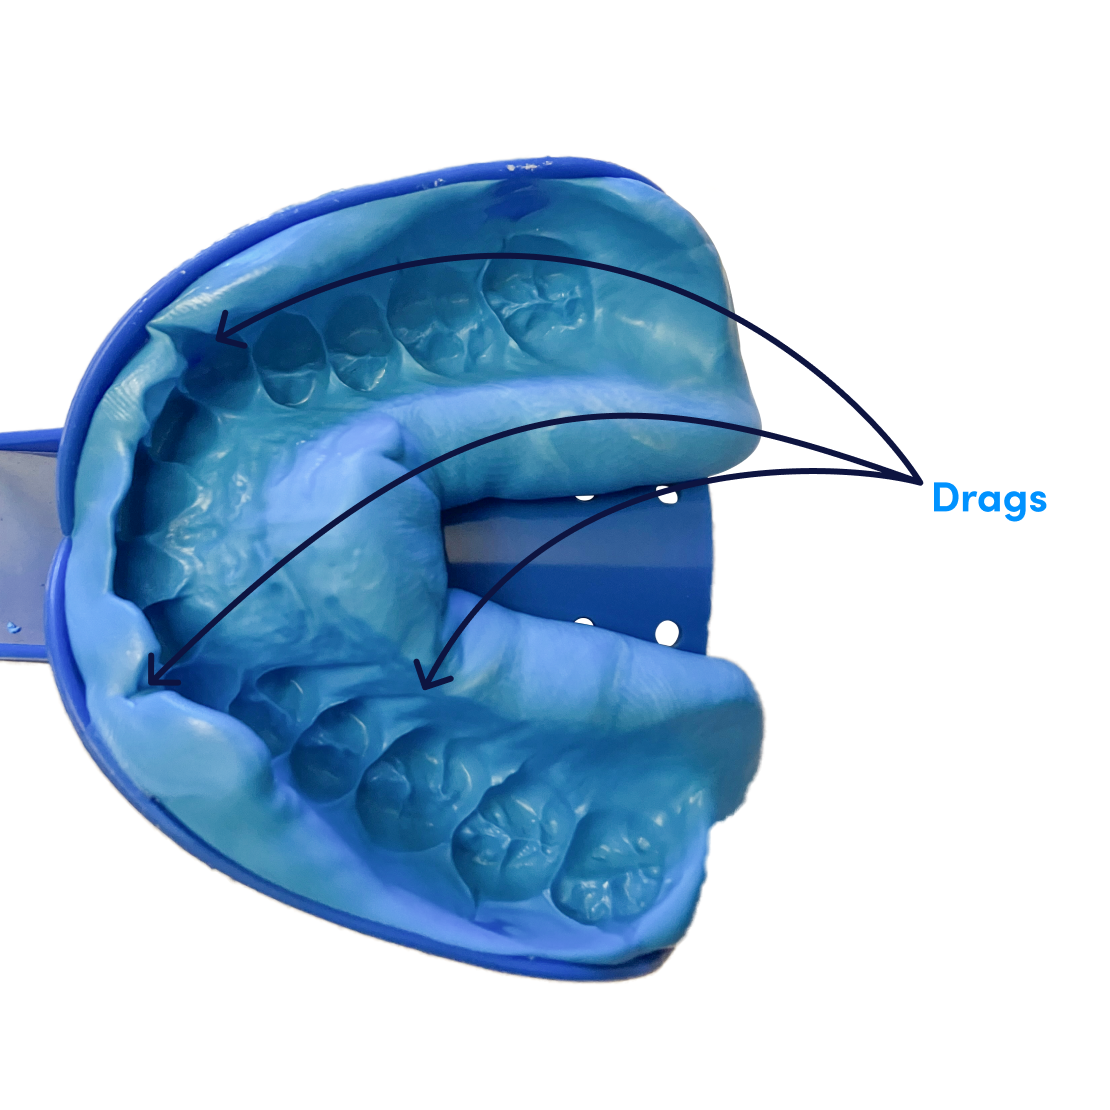
Bad impression #1
Drag marks on the impression.
You can get drag marks on your impressions if the putty has not been fully set and is removed (pulled out) from the mouth too soon.
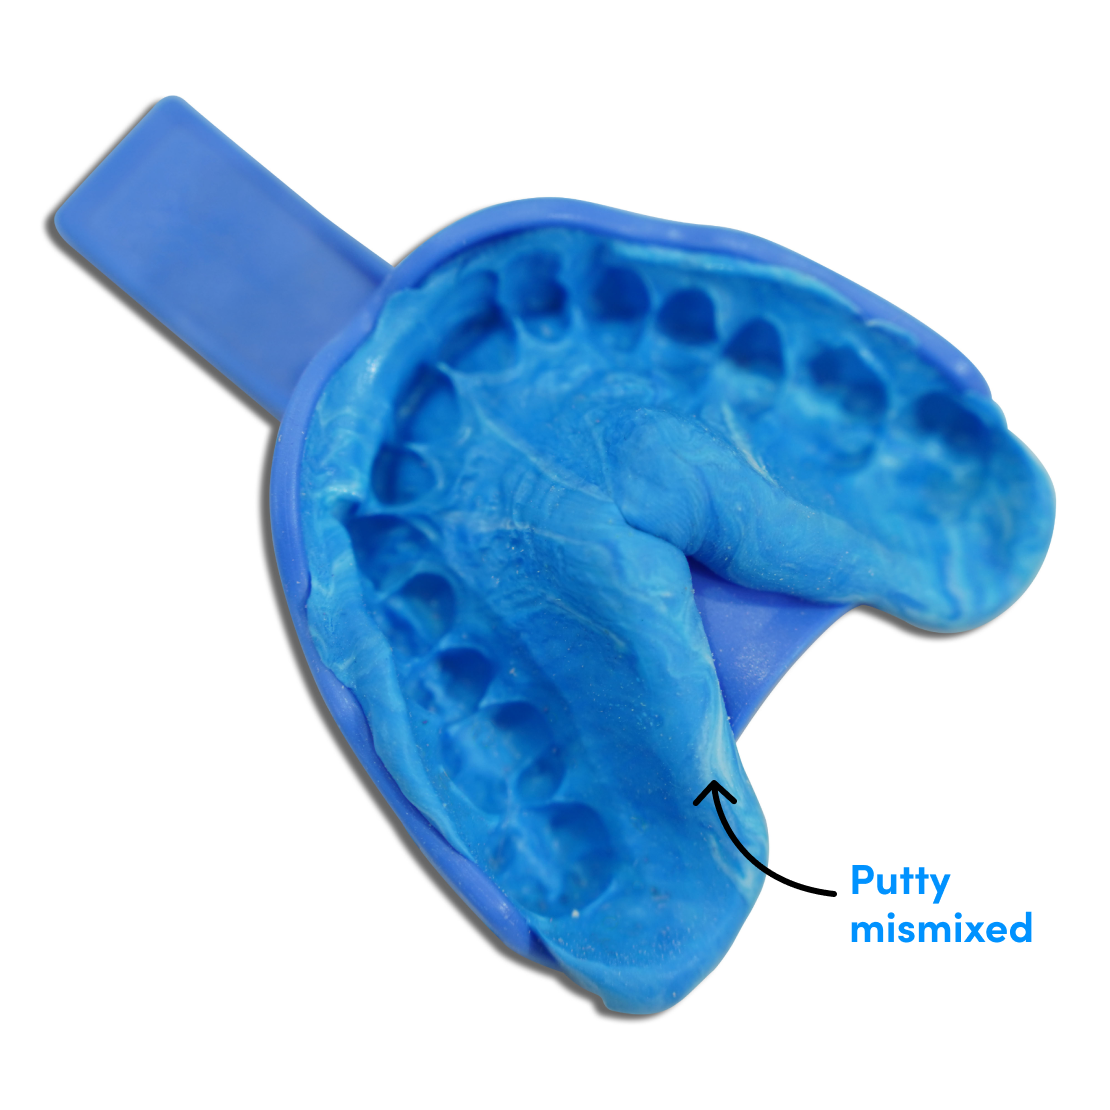
Bad impression #2
Inadequate amount of putty mixing.
The blue and white putties should be mixed until the putty is left with no streaking. This should be done before the material hardens up.
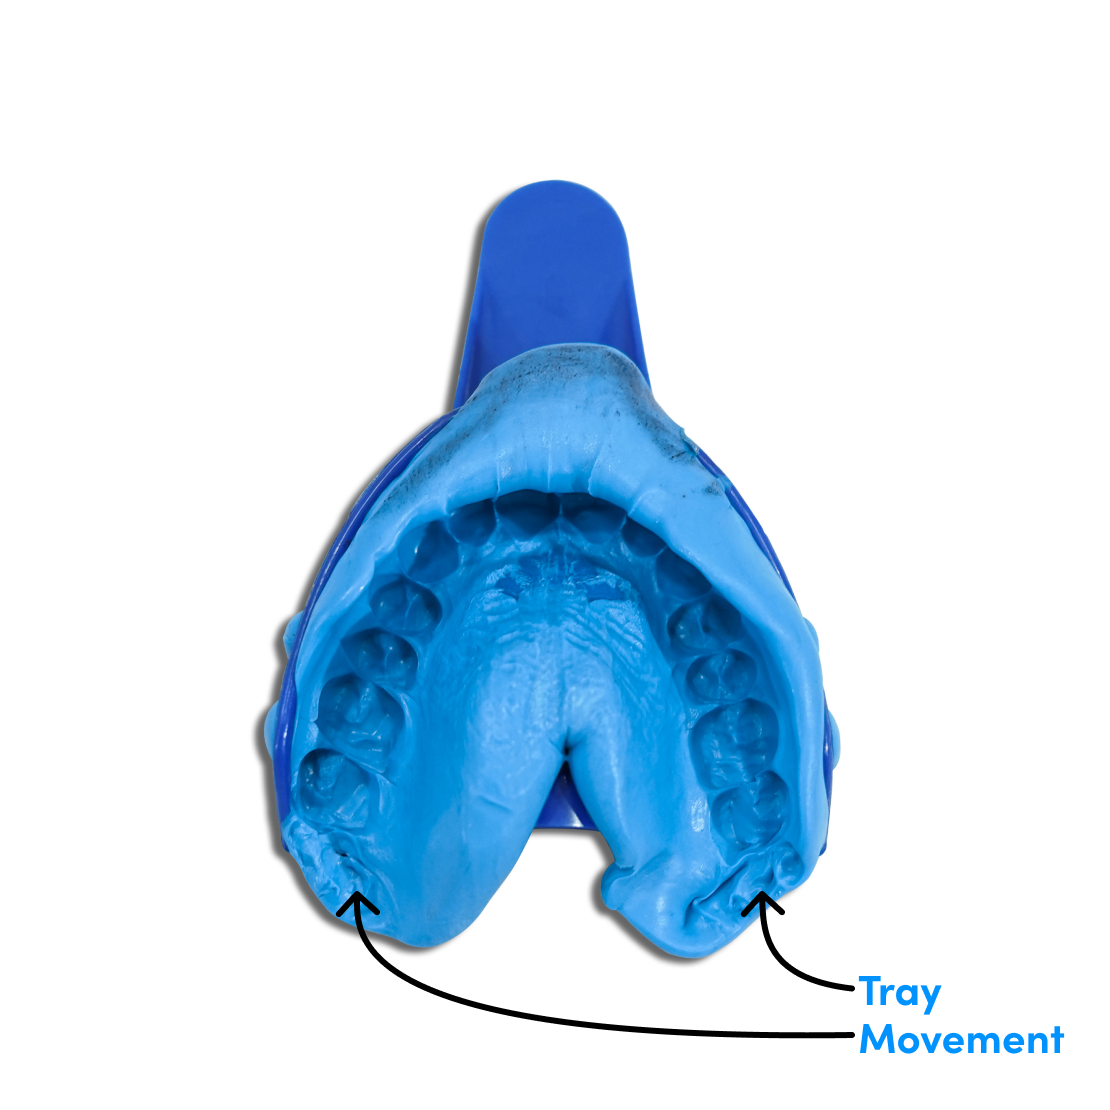
Bad impression #3
Teeth movement during the impression.
If you move your teeth while taking impressions, your tray may change its position too in your mouth. Use your fingers to hold the tray in place.
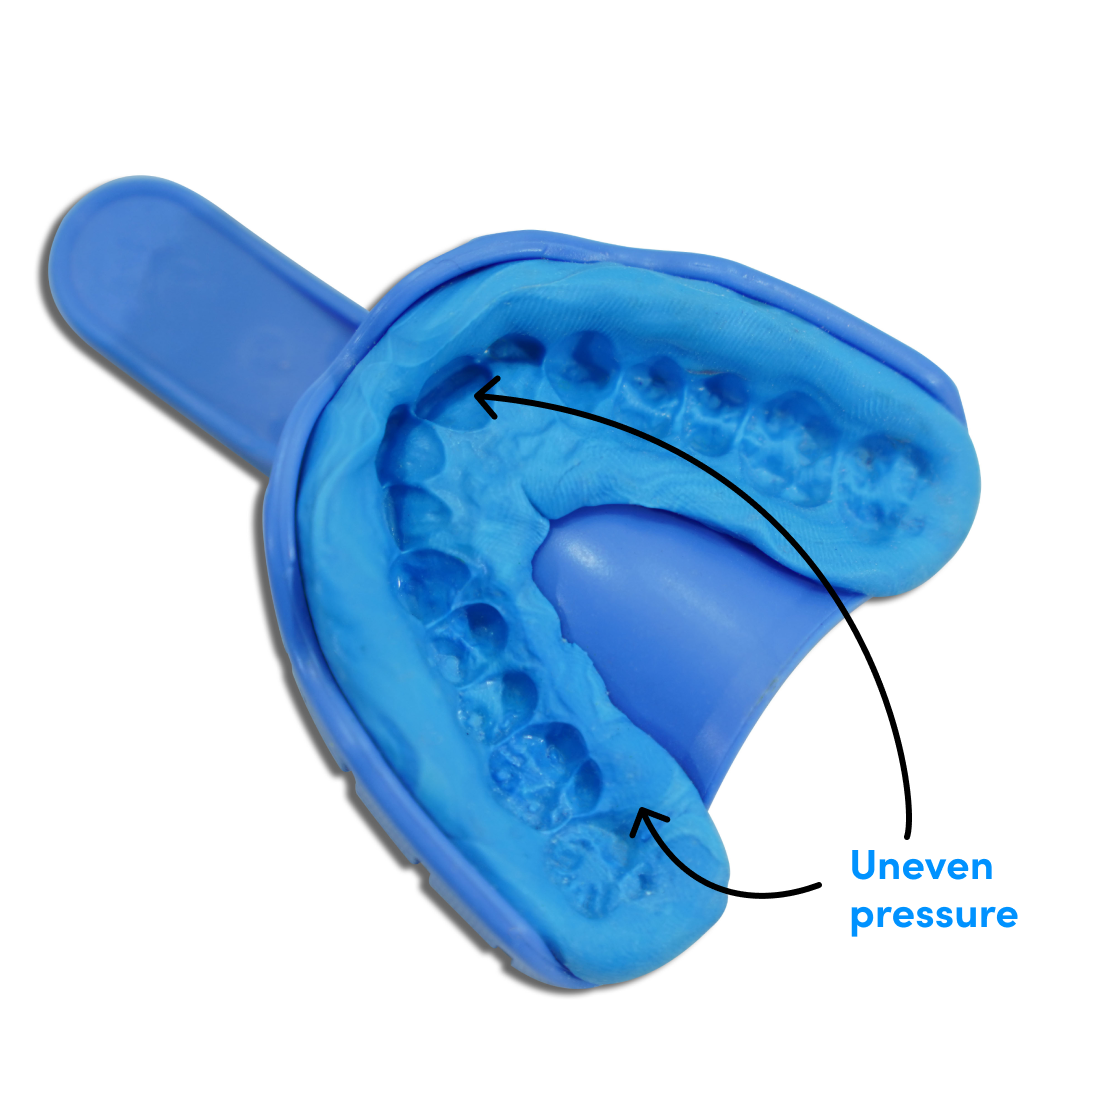
Bad impression #4
Uneven pressure.
Use your fingers to apply the same pressure to all parts of your teeth, including the molars. You should feel the putty touching your gums back and front.


FAQs
Here are some of the most frequently asked questions:
How to ship back my dental impressions?
A return envelope with pre-paid return shipping label is included with each shipment. Don't toss the envelope away because it can occasionally be mistaken for package filler. When you are finished, place your teeth impressions inside the envelope and mail them back to us.
How long does it take to get my treatment plan?
It takes around 4–6 weeks. Send your impressions back promptly, complete your account center information, and submit your images to ensure that it happens as soon as possible. Having this information at our disposal is quite essential.
How do I know if I did the process correctly?
All we need is one accurate imprint of your top and bottom teeth. The impression kit comes with four sets of putties. We need at least one good impression of both arches. Send your teeth impressions back to have them evaluated. We will contact you to arrange a replacement kit if more impressions are required.


